
Let’s be honest – few things can ruin a camping trip faster than the dreaded sound of water dripping inside your rig. You wake up after a heavy rainstorm, step out of bed, and realize you have a puddle right in the middle of your living space. If you have owned a motorhome, travel trailer, or fifth wheel for any length of time, you already know that roof maintenance is simply part of the lifestyle.
When water finds its way into microscopic cracks in your roofing membrane, it doesn’t just stop there. If the temperature drops, the trapped water freezes and expands, acting like a slow-motion jackhammer that pushes those tiny cracks open even wider. Then it thaws, gets deeper into the substrate, and the vicious cycle repeats. Before you know it, heavy snow or standing water creates sagging spots, leading to ponding water that breaks down standard, everyday coatings.
If you are dealing with a leak or facing severe weather damage, do not panic. You don’t necessarily need to spend thousands of dollars on a brand-new roof, and you certainly don’t need to be a professional contractor to fix it. With the right approach and a high-quality rv roof sealant, you can tackle the job yourself, adding decades of life to your rig for a fraction of the cost of a traditional roof replacement. Here is exactly how to find those hidden leaks, prep your surface like a pro, and permanently seal your roof.
Step 1: Diagnose the Damage
Before you can fix a leak, you have to understand what you are dealing with. Head up to your roof and do a thorough physical inspection. Don’t just look – feel around. If you press down on the membrane and feel blisters or bubbles, that usually means moisture has already bypassed the top layer and is trapped beneath it, or that the adhesion is actively failing.
Keep an eye out for peeling, delamination, or severe chalking (especially on EPDM roofs, where the white layer wears away, exposing the black rubber underneath). Also, inspect the areas where water tends to sit. If water ponds on your roof and remains there for more than 48 hours without draining, it’s actively eating away at standard acrylic and elastomeric coatings.
The vast majority of leaks don’t happen in the middle of a flat membrane; they happen at the transitions. Look closely at your seams, the edges around your air conditioning units, your skylights, and your plumbing vents. If you see cracked, separated, or missing caulk, you have likely found the culprit.
Step 2: The Most Crucial Phase – Cleaning and Surface Prep
We cannot stress this enough: you cannot just slap a patch over a dirty roof and expect it to hold. Roof prep is the single most important step in the entire rv roof repair process. Coatings and sealants need a pristine surface to chemically bond with. If there is oil, grease, dirt, or microscopic mold spores sitting between your roof and your new coating, you will create blisters that will eventually tear open and leak again.
Start by sweeping away all loose debris. Next, you need a heavy-duty cleaner that goes beyond regular soap. We highly recommend using a specialized product like Roof Protect cleaner. It is specifically formulated to emulsify dirt, grease, and the chalky oxidation that builds up on old roofs. More importantly, it features a built-in mildewcide that kills living mold spores on the spot, ensuring nothing grows underneath your new membrane. Use a good bristle brush or a light power washer to scrub the surface thoroughly, then rinse it clean.
Step 3: Reinforcing Your Seams and Penetrations
Once the roof is spotless and dry, it is time to address the weak links: the seams and the areas around your vents. Do not skip this step!
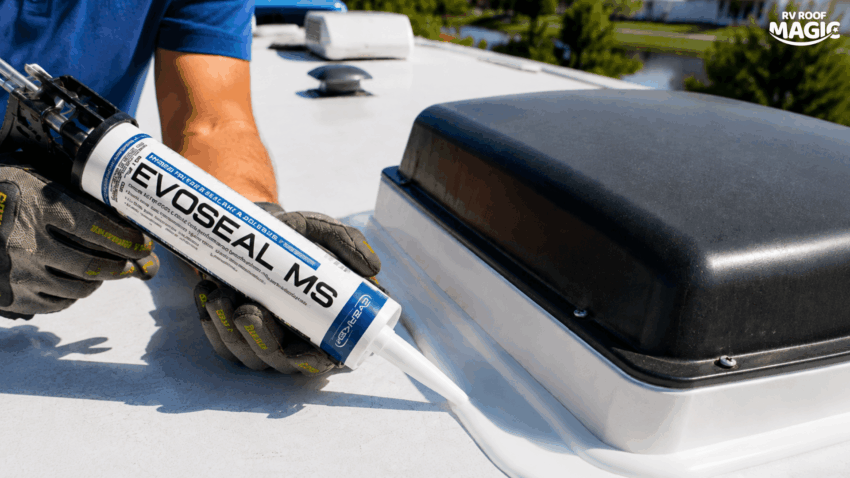
If you have old, flaking silicone caulk around your vents, it has to go. Nothing sticks to silicone – not even new silicone – so you must scrape it away and replace it with a compatible Butyl MS Caulk.
For separated seams, tearing joints, or areas suffering from severe cracking (often called “alligatoring”), you need something with serious structural integrity. This is where a product like SeamTight comes in. Designed with an incredible 400% elongation and 1000 PSI tensile strength, it acts as a flexible yet incredibly tough filler.
To repair a bad seam, push the SeamTight product out along the joint, then use a paintbrush to smooth it. While the material is still wet, lay down a strip of Poly Fabric. Use a dry paintbrush to press the fabric down, impregnating it with SeamTight so the liquid absorbs into the fibers. Once that sets overnight, you have an indestructible, UV-stable joint that will never pull apart, even when your RV is twisting down a bumpy highway or surviving a 30-degree temperature drop.
Alternatively, for quick and effective seam reinforcement, you can use our TP 4X50 Seam Tape. Peel the release paper and press it over the adjoining areas to create a solid, flexible bridge over cracks and penetrations.
Step 4: Applying Your RV Roof Coating
With your seams reinforced and your roof clean, it is time to apply the main barrier. You need a membrane that is going to last, and standard water-based acrylics don’t cut it. They sit on top of the roof, break down under standing water, and typically only last 4 to 5 years.
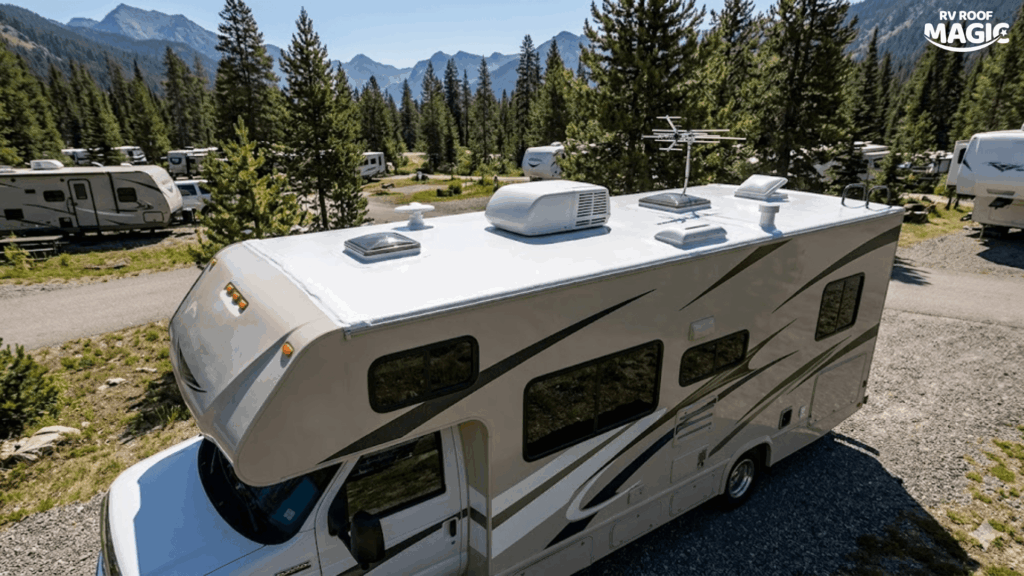
For a true “one – and – done” fix, you need a liquid rubber system like RV Roof Magic. What makes this RV roof coating so entirely different is its proprietary solvent-based chemistry. When you apply it, it doesn’t just dry on top of your existing roof; it creates a chemical cross-link. Think of it like a spider web locking together. The coating actually bonds to your existing substrate, forming a seamless, monolithic membrane.
Because of this unique chemistry, rv roof magic boasts an over-25-year history of success and comes with a 20-year warranty. It is a genuine one-coat system, which means you never need to buy or apply a primer. It goes right over EPDM, fiberglass, metal, weathered aluminum, aged vinyl, and TPO. (Remember, it cannot be applied over PVC roofs or silicone coatings).
It is naturally UV and ozone-resistant, meaning the sun won’t bake it until it becomes brittle. And unlike cheaper alternatives, it is fully capable of withstanding ponding water year-round.
Step 5: How to Roll It Out
The actual application process is surprisingly simple. You don’t need expensive sprayers or a crew of technicians.
- Mix Thoroughly: Do not try to stir this product with a wooden stick by hand. You need an electric drill mixer. Mix it continuously for about 5 minutes to ensure the synthetic rubber and solvents are perfectly blended.
- Section It Off: rv roof magic covers roughly 50 square feet per gallon. The easiest way to keep track of your coverage is to use chalk to mark your roof into 5-foot by 10-foot rectangles. One gallon will perfectly coat one of those rectangles.
- Roll It On: Tape off your edges with blue painter’s tape for clean, sharp lines. Then, pour the liquid rubber out and spread it evenly using a medium 3/8-inch nap roller. Avoid foam rollers, as the solvent will eat right through them.
Once applied, the coating self-levels and cures into a beautiful, seamless white finish that looks like a custom-fitted sheet. Because it is solvent-based, humidity has very little effect on it. As long as temperatures are above 50 degrees, it can handle light rain within as little as 3 hours after application.
Hit the Road with Peace of Mind
There is absolutely no reason to let a winter-worn roof or unexpected water leaks ruin your upcoming travel season. By taking the time to inspect your rig, thoroughly clean the surface, reinforce the weak seams with heavy-duty fabric and butyl sealants, and finish it all off with a chemically bonded liquid rubber membrane, you are essentially giving your RV a brand-new roof.
It is an easy, highly cost-effective weekend project that pays dividends for decades. Seal those leaks correctly today, drive away tomorrow, and you will sleep incredibly soundly on your next camping trip, knowing your roof can handle absolutely anything Mother Nature throws its way.rv roof magic contact number: 888-341-6670.