
Finding a leak in your camper is a gut-punch moment. You’re usually out in the middle of a great trip when you spot that dreaded damp patch on the ceiling or hear the steady “drip” hitting the floorboards. Instantly, your mind goes to the worst – case scenario: “How much is this going to cost me?” or “Is my whole roof rotting away?”
The truth is, most RV owners overcomplicate the fix. You don’t need to be a professional contractor, and you don’t need to spend thousands at a service center. Fixing it the “easy way” isn’t about cutting corners; it’s about using the right stuff so you only have to climb up that ladder once.
At RV Roof Magic, we’ve seen every DIY mistake in the book. Here is the straightforward, no-nonsense guide to a permanent, professional-grade RV roof repair that actually lasts.
The Reality Check: Why Most Repairs Fail
Before we get into the “how – to,” let’s talk about why people end up fixing the same leak three times. Most folks run to the local hardware store and grab a tub of generic elastomeric paint or some cheap silicone caulk.
Those products aren’t built for the road. An RV is essentially a rolling earthquake; it vibrates, it expands in the sun, and it shrinks in the cold. Generic products sit on top of the surface like a Band-Aid. Eventually, they peel.
The “Easy Way” relies on a dedicated rv roof coating that chemically bonds to your roof. Instead of just sitting on top, it becomes part of the membrane itself.
Step 1: The “Search and Destroy” Inspection
You can’t fix what you can’t see. Grab a ladder and get a bird’s-eye view of your rig. You’re looking for three specific troublemakers:
- The Flaking Crap: If you rub your hand across the roof and it looks like you’ve been playing with chalk, your roof is oxidizing. That white dust is your roof literally disintegrating.
- Hairline Fractures: Check the sealant around your AC, vents, and TV antenna. If it looks dry, cracked, or like it’s pulling away from the edges, that’s your leak source.
- The Soft Spot: Carefully walk the roof. If a spot feels “spongy,” water has already gotten underneath. You need to address this immediately before mold takes over.
Step 2: Cleaning (Don’t Skip This!)
I know, scrubbing a roof isn’t anyone’s idea of a fun Saturday. But look at it this way: an RV roof sealant is only as good as the surface it’s sticking to. If there’s dirt, tree sap, or old “chalk” under your coating, it’s going to fail.
Use a dedicated cleaner, such as roof protect cleaner. Avoid dish soaps or anything with citrus or petroleum – those can actually eat away at your EPDM rubber. Scrub it down, rinse it well, and let it dry completely. If you apply sealant to a damp roof, you’re just trapping moisture in a tomb.
Step 3: Reinforce the Joints
Most leaks happen at the seams. Before you coat the whole roof, you need to “detail” the trouble spots.
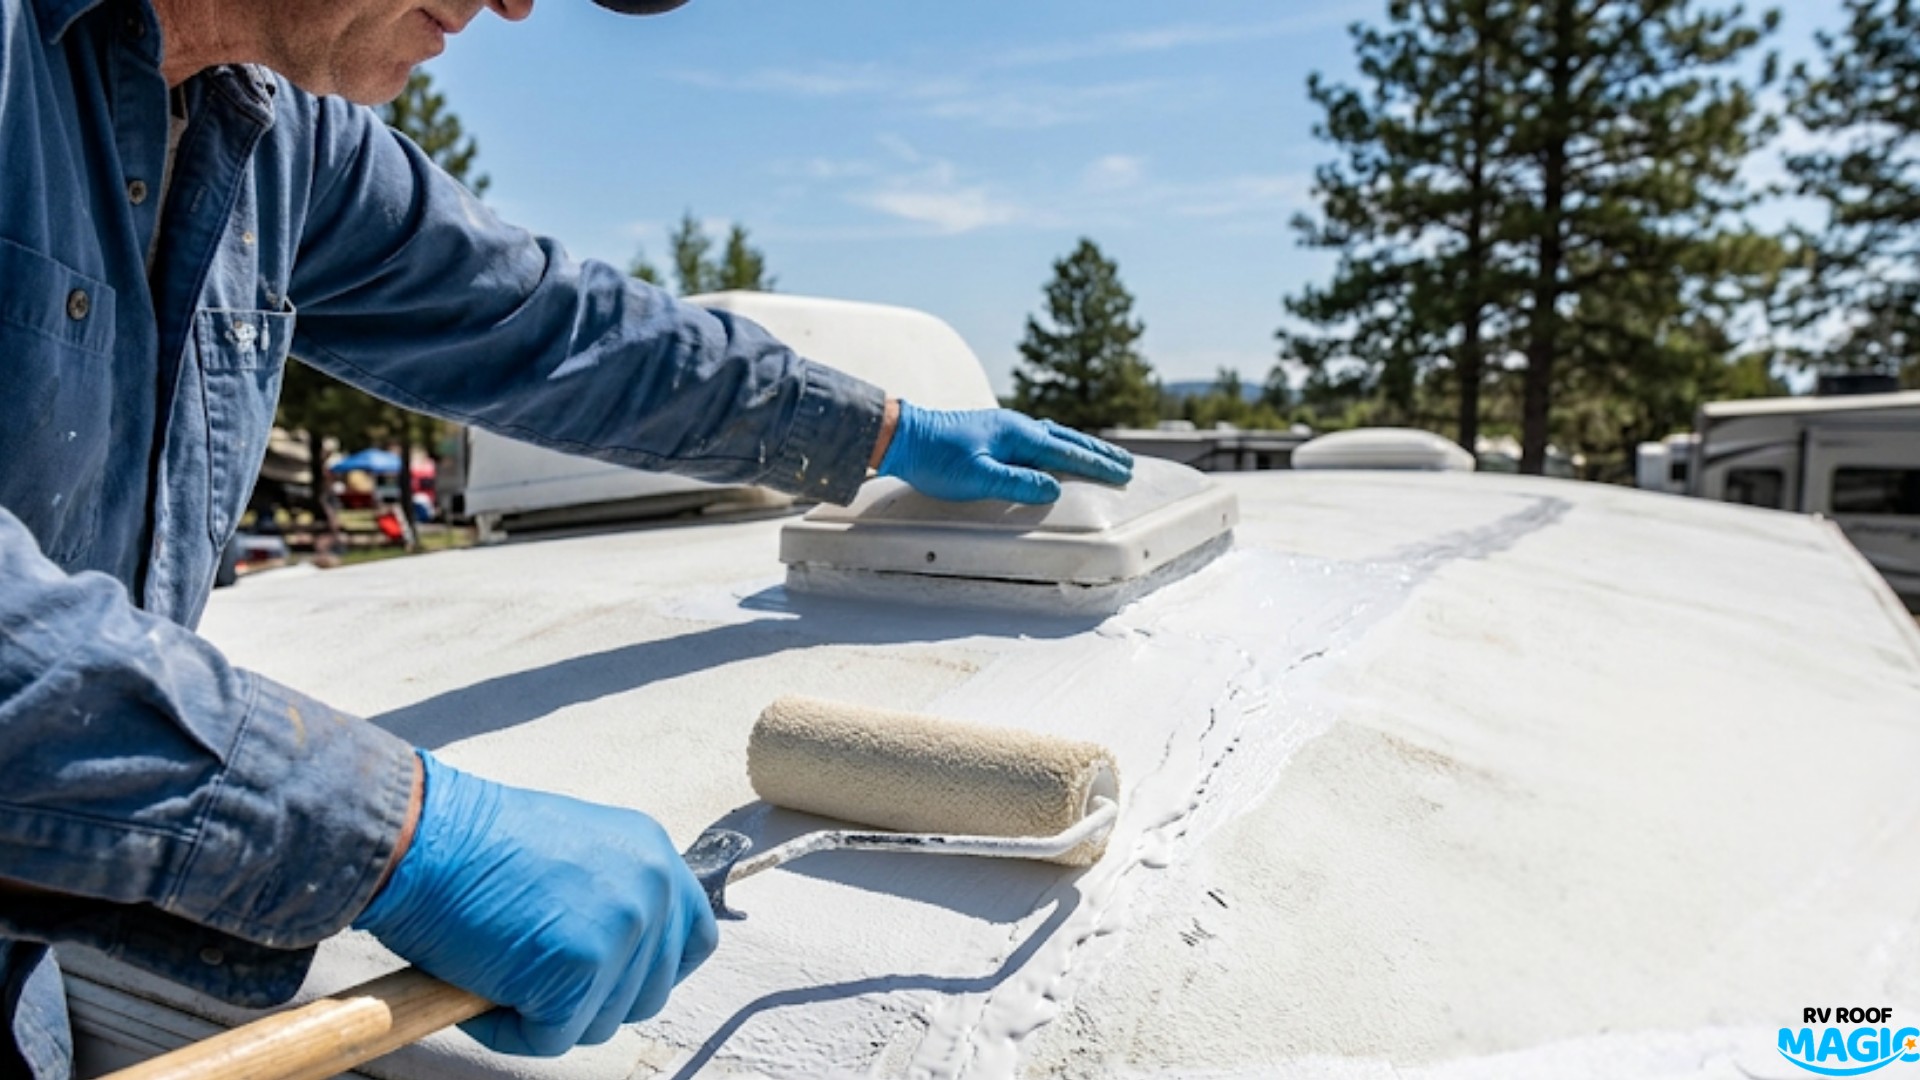
- Seam Tight & Butyl MS Caulk: These are your best friends. Apply these around the base of your vents and along the front and rear caps.
- The Bridge Method: If you have a physical tear from a low – hanging branch, don’t just glob sealant on it. Lay down a piece of Poly Fabric and saturate it with the sealant. It’s like a cast for your roof – it provides structural strength that a liquid alone can’t match.
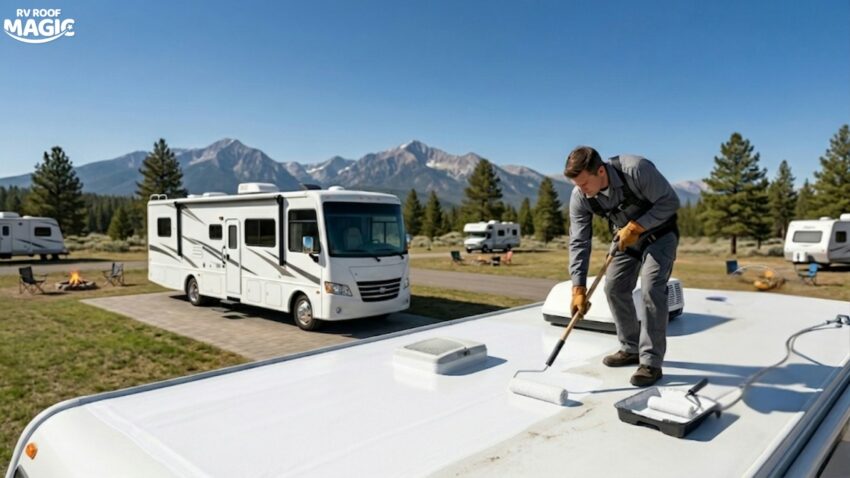
Step 4: The One-Coat Solution
This is where the “Easy Way” earns its name. Most systems require a primer, then a base coat, then a top coat. That’s three days of work and three times the chance for a rainstorm to ruin your project.
RV roof magic is a true one-coat system. It’s a solvent-based formula, meaning it doesn’t need a primer on EPDM or fiberglass.
- Mix it like you mean it: Use a drill mixer. You need to get those polymers moving for about 5 minutes.
- Pour and Roll: Use a 3/8″ nap roller. Start at the front and work toward your ladder.
- Don’t overthink it: The coating is self-leveling. It might look a little wavy when you first roll it, but give it twenty minutes, and it will smooth out into a factory-perfect finish.
Timing is Everything
One of the most “human” parts of this job is worrying about the weather. We’ve all been there – the job is half-done, and you see a dark cloud.
Because our rv roof coating is solvent-based, it’s waterproof much faster than water-based alternatives. It can handle a surprise drizzle just a few hours after application. Plus, it’s designed to handle extreme temperature swings. Whether you’re camping in the Arizona heat or a Canadian winter, this stuff stays flexible.
Why Do It Yourself?
Beyond saving a few hundred bucks in labor, doing your own RV roof repair gives you a level of intimacy with your rig. You’ll know exactly where the seams are, how the seals look, and you’ll have the peace of mind that it was done right.
No more “emergency” tarping in the middle of a storm. No more ruined upholstery. Just a solid, white, reflective roof that keeps your interior cool and dry.
Ready to get started?
Don’t wait for the next rainstorm to tell you that your roof is failing. Take control of your maintenance now so you can focus on the road ahead. You can find all the specialized cleaners, fabrics, and the legendary rv roof magic coating directly on our site.
Your RV is your home away from home. Treat it like one. Give it the protection it deserves, the easy way.