
Most RV owners are good at checking the obvious things before a trip. Tires, batteries, water tanks, lights, maybe even the fridge. But the roof often gets ignored because, let’s be honest, it is out of sight most of the time. That is usually where the trouble starts.
An RV roof can look fine from the ground, while small cracks, dry caulk, worn seams, or soft spots are slowly getting worse. You may not notice anything until a rainy night, when a stain appears on the ceiling or water starts seeping around a vent. By then, the problem is no longer just on the roof. It may already be inside the RV.
That is why roof coating repair is worth doing before water damage starts. It is a preventive step, not just a last-minute fix. A clean, sealed, properly coated roof can help protect the RV from leaks, sun damage, and hidden moisture problems that can become expensive later.
For many owners, a practical rv roof repair begins with inspecting the roof, fixing weak spots, and applying a coating made specifically for RV surfaces.
Your RV Roof Takes More Abuse Than You Think
An RV roof does not have an easy life. It sits under direct sunlight for hours. It handles rain, wind, dirt, tree branches, temperature changes, and road movement. Every trip adds vibration. Every season adds another layer of wear.
The weak areas are usually the same: around vents, AC units, skylights, seams, joints, edges, and old caulk lines. These areas should be checked often because they are the first places water typically enters.
A small crack near a vent may not look like a big deal today. But water only needs one opening. Once it gets under the roof surface, it can move quietly. The internal damage may show up much later, and by then the repair can be more involved.
This is why coating the roof before a leak appears is a smart habit. You are not waiting for damage. You are stopping the roof from reaching that point.
Start With a Real Inspection
Before opening a pail of coating, take a careful look at the roof. Do not just glance over it. Walk the roof safely and inspect all the places where water could collect or enter.
Look around the AC unit. Check every vent. Look at the roof edges, skylights, seams, and any area where caulk has been used before. If the caulk is cracked, loose, or pulling away, it needs attention before coating.
RV Roof Magic recommends checking seams, joints, AC units, and vents before application. If there is silicone caulk on the roof, it should be replaced with compatible Butyl MS caulk. rv roof magic should not be applied over silicone coatings or silicone caulk.
You should also make sure the surface of your roof is compatible. RV Roof Magic can be used on EPDM, Alpha rubber, fiberglass, aged vinyl, butyl rubber, Hypalon rubber, metal, weathered aluminum, TPO, and roofs previously coated with non-silicone products. It should not be used over PVC roofs or silicone coatings.
That one detail matters. A good product still needs the right surface.
Cleaning the Roof Is Half the Job
This is the part many people want to rush, but it is one of the most important steps. A roof coating needs a clean, dry surface. If the roof has dirt, grease, mildew, loose coating, or old grime, the coating cannot bond properly.
RV Roof Magic recommends using Roof Protect before applying the coating. Roof Protect is made to remove oil, grease, mildew, dirt, and other soils from the roofing membrane. It also includes a mildewcide to help kill living Mold spores before coating.
A light power wash can help if you have one. If not, a strong bristle brush and a little patience can still do the job. The goal is simple: get the surface clean enough for the coating to bond to the roof, not to dirt sitting on top of it.
After cleaning, let the roof dry fully. Not almost dry. Fully dry. Moisture under the coating can cause blistering, so this is not a step to guess on.
Fix the Weak Spots First
A roof coating is not meant to hide bad prep work. If there are gaps around vents, open seams, loose caulk, or problem areas near the roof edge, repair them before the full coat goes down.
Butyl MS caulk can be used around cracks and gaps to help reinforce those areas. This helps prevent voids beneath the coating and provides a better base for the main application.
Think of it this way: the coating is the protective layer, but the details underneath still matter. If the weak spots are handled first, the result is stronger.
A good rv roof sealant system is really a combination of cleaning, caulking, coating, and providing the right conditions for the product to cure.
Why RV Roof Magic Is a Good Fit for RV Roof Coating Repair
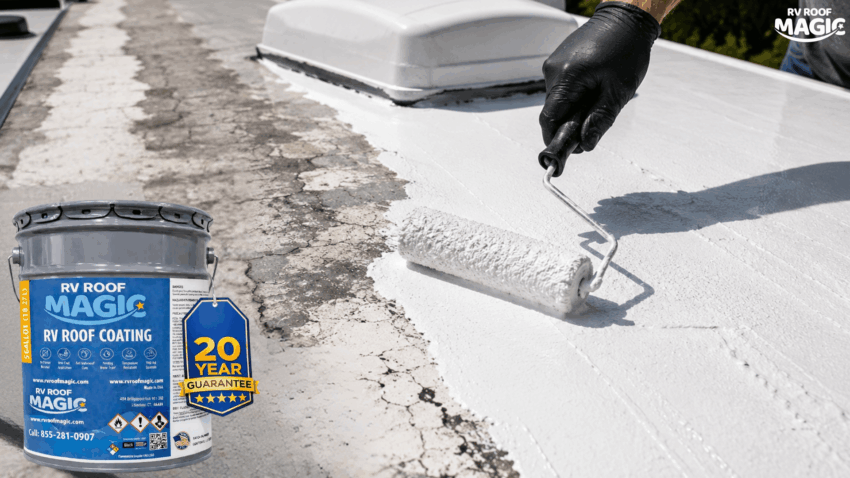
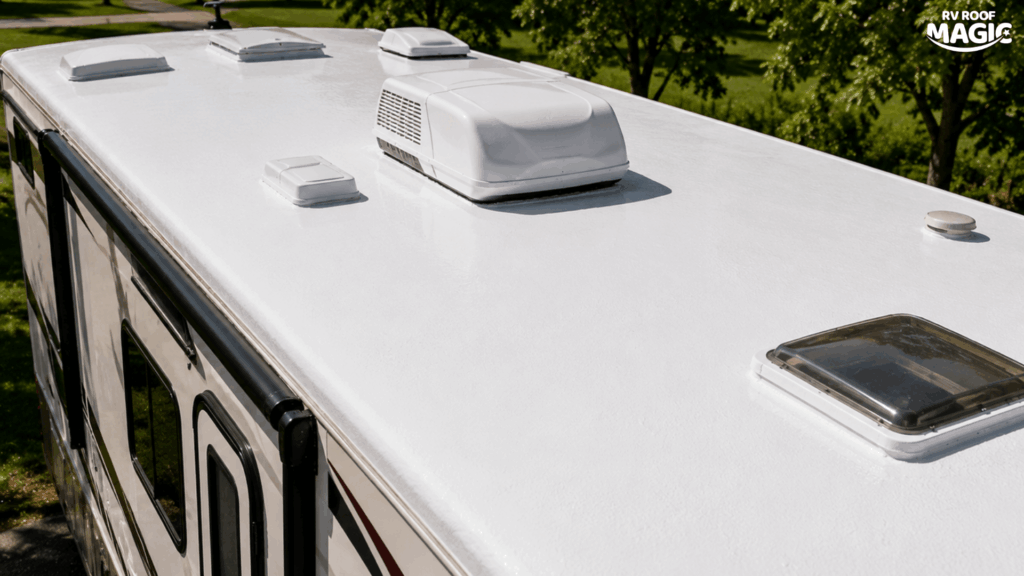
RV Roof Magic is a solvent-based, single-component moisture-cure coating made for RVs, trailers, and mobile homes. Once applied, it creates a seamless protective coating over the roof.
One helpful feature is that it is designed for one-coat application. It does not require a primer on approved surfaces. That makes the job more straightforward for RV owners who want to restore their roof without a complicated, multi-step system.
It also includes features that matter for RV roofs, such as UV resistance, reflectivity, high tensile strength and elongation, and protection against UV degradation and premature roof failure. It also contains fungicides and mildewcides.
That flexibility is important because RV roofs move. They expand, contract, and flex while traveling. A coating needs to accommodate that movement rather than become brittle too quickly.
Applying the Coating Without Overcomplicating It
RV Roof Magic is ready to use and should not be thinned. Before applying, mix it well with an electric drill mixer for about 5 minutes to ensure the solvent is evenly distributed.
For most RV roofs, a 3/8-inch medium nap roller works well. A chip brush can help with corners, edges, and vertical areas. A foam roller is not recommended.
Coverage is about 50 square feet per gallon. One easy way to stay on track is to mark the roof into 5 x 10-foot sections. One gallon should cover one of those sections. This helps you avoid stretching the product too thin.
Choose the right weather window. The roof should be dry, and rain should not be in the forecast when you apply it. RV Roof Magic can handle a light rain after about three hours if temperatures are above 50 degrees, but starting with a dry day is still the best approach.
The coating is usually dry to the touch in about 3 to 4 hours. Wait a full 24 hours before traveling.
RV Roofs May Need a Flash Coat
If your RV roof is EPDM, there is one extra point to know. Depending on the roof’s age and condition, some bubbling may happen while the coating dries. RV Roof Magic explains that this is temporary and that the product self-levels as the solvent evaporates.
To help reduce bubbling, a very light flash coat can be applied first. Let that flash coat dry completely before applying the main coat. You do not need extra product for this step, but you do need patience.
Keep an Eye on the Roof After Coating
Once the roof is coated, the job is not something you forget forever. RV roofs should still be checked regularly. Remove leaves, dirt, and debris. Look for branch damage. Check seams and roof fixtures after storms or long trips.
If a small area gets damaged, touch it up before the substrate continues to deteriorate. RV Roof Magic also recommends using Roof Protect annually to help remove dirt and grease and extend roof life.
Final Thoughts
rv roof coating repair is one of those jobs that is better done early. You do not want to wait until water has already stained the ceiling or damaged the inside of the RV.
A clean roof, repaired seams, compatible caulk, and a proper coating can help prevent small roof problems from turning into bigger ones. RV Roof Magic gives RV owners a practical way to coat and protect approved roof surfaces with a one-coat, no-primer system.
Your RV roof protects everything underneath it. Take care of it before the leak starts, and the whole RV has a better chance of staying dry, protected, and ready for the next trip.