
There’s a special kind of excitement that comes with holiday road trips. Packing up your RV, mapping out scenic stops, and imagining all the memories you’ll make—these are the moments travelers look forward to all year. But while you’re planning destinations and stocking snacks, let’s talk about one area of your camper that often gets overlooked: the roof.
I’ve seen it far too often—people invest time and money into their vehicles and then miss that final, critical step. The roof is your first line of defense against unpredictable weather and the elements. Before you hit the open road, give your RV roof the care it deserves so you’re ready for any adventure.
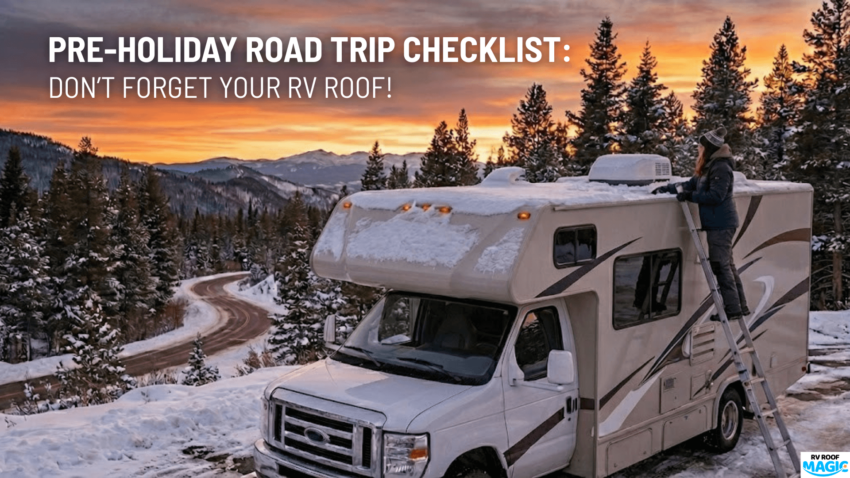
Why Your RV Roof Needs Attention Before Every Trip
Imagine it’s pouring outside, or the sun is beating down as you cruise highway miles. Your roof takes the brunt of it all. From blazing sun to icy rain, it faces wear and tear daily. It’s easy to forget about it until you spot a leak or a patch of bubbling. But trust me—taking a few easy steps now can save you hundreds of repairs later and keep your trip drama-free.
That’s where innovative solutions like camper roof sealant come in. A few minutes spent here can mean the difference between a warm night inside and an unexpected water leak.
Step 1: Start With a Clean Sweep—Roof Cleaning
Let’s start simple: give that roof a good cleaning. Dust, leaves, and even miscellaneous bird droppings can work their way into seams, degrading the surface over time. EPDM Coatings offers top-notch, easy-to-use RV roof-cleaning and sealing products, so you start with a “blank canvas.” It’s satisfying to see all that grime disappear—plus, it gives you a chance to inspect everything up close.
A clean roof isn’t just about aesthetics. Debris can trap moisture, creating pockets where rot and damage develop silently over months. By removing everything from the surface, you’re also preparing your roof to bond with any protective coatings or sealants properly you’ll apply next. This simple step sets the foundation for everything else on your checklist.
Step 2: Inspect Every Inch
Yes, roll up those sleeves! Get up on a sturdy ladder (safely, please) and look closely for cracking around roof seams, bubbles under old coatings, and any places where water likes to gather. Don’t just glance—really look. Even a tiny weak spot can become a 3 a.m. leak halfway through your trip.
Pay particular attention to areas around vents, skylights, and air conditioning units. These penetrations are common trouble spots where sealant can deteriorate faster. Check for any discoloration, soft spots, or areas where the old coating is peeling away. If you notice ponding water—areas where water sits rather than drains off—mark those spots. They’ll need extra attention because standing water accelerates roof breakdown and significantly shortens its lifespan.
Step 3: Reach for Reliable RV Roof Repair Products
When you spot damage, here’s where technology works in your favor. I’m a fan of EPDM Coatings’ RV roof repair products—and no, that’s not just a plug! The formulas actually chemically bond to your roof. You don’t need specialized tools, and there’s no primer required. Apply one thick, even coat, and it essentially transforms the entire surface into a seamless, waterproof shield.
What sets these products apart is the unique chemistry that powers them. As Liquid Butyl Rubber dries, it chemically cross-links with your existing roof surface, creating a bond so strong that the coating and roof literally become one unified membrane. Unlike traditional coatings that sit on top, this fusion process ensures long-term durability. The coating results in a 20-mil film thickness in just one application—something other products need two or three coats to achieve.
Another impressive feature? During the drying process, the product forces trapped air up and out to the surface. This is crucial because trapped air is what causes other coatings—especially elastomeric and water-based options—to crack and fail after just a few years. With over 1,520 psi tensile strength, this coating can withstand the constant expansion and contraction of your roof due to temperature swings, from freezing nights to blazing afternoons.
Step 4: Seal the Details—and Don’t Rush It
Here’s an insider tip: pay special attention to vents, AC units, and roof edges. These are classic trouble spots. Using an advanced RV rubber roof coating like Liquid Butyl Rubber, you get serious flex—enough to handle big temperature swings without cracking. Take your time, let everything dry according to the instructions, and you’ll give those problem areas extra protection.
The 500% elongation capability means your roof coating moves and flexes with your RV as it travels highways, encounters rough terrain, and weathers temperature extremes. Unlike rigid coatings that crack under stress, this flexible membrane adapts, ensuring continuous protection mile after mile. Whether you’re parking in the Arizona desert or camping in the Colorado mountains, your roof remains sealed tight.
And here’s a bonus: because it’s a solvent-based system rather than a water-based one, it won’t freeze during application in cold weather. The coating is significantly less susceptible to climate conditions and maintains high resistance to extreme weather. It can withstand pond water year-round, making it ideal for RVs with flatter roof sections where water naturally collects.
Step 5: Routine Maintenance Is Your Best Friend
The secret to a long-lasting roof isn’t just one-time fixes. It’s regular attention—think simple cleaning and annual check-ups. EPDM’s formulas are shelf-stable and budget-friendly, perfect for easy touch-ups and mid-season inspections. A well-cared-for roof resists mold, keeps the inside cool, and won’t let unexpected leaks ruin your plans.
Think of roof maintenance like changing your oil—do it regularly, and you’ll get far more life out of your investment. With a proper coating that can extend your roof’s life by 18-20 years, compared to traditional coatings that last only 4-5 years, you’re not just maintaining your RV—you’re protecting a significant investment for the long haul.
You Might Wonder…
Can I really apply these coatings in winter? Yes, you can! Liquid Butyl Rubber actually works in cold climates, pausing its drying process when temperatures dip and resumes when things warm up. This means you’re not limited to summer maintenance—you can tackle roof repairs whenever your schedule allows.
Water-based vs. solvent-based—does it matter? Absolutely. Solvent-based coatings like this one won’t freeze or peel in harsh weather. That’s better performance and less worry. They offer superior adhesion, greater resistance to extreme temperatures, and longer-lasting protection than water-based alternatives.
Your Trip, Your Memories—Protect Them!
Here’s the thing: holiday trips are meant for laughter, campfires, and gorgeous sunsets, not roof problems. Spend a little extra time with RV roof cleaning and sealing, switch out old sealants for EPDM’s advanced camper roof sealant, and you’ll travel with genuine peace of mind.
When you choose quality products with proven track records—backed by over 25 years of success in the RV industry—you’re choosing reliability. You’re choosing to drive away tomorrow knowing your roof can handle whatever weather comes your way. And you’re choosing to focus on what really matters: creating unforgettable memories with the people you love.
Ready to Get Started?
Check out RV Roof Magic’s full lineup of RV roof repair products and treat your vehicle with the best RV rubber roof solutions available. You’ll be ready for whatever Mother Nature throws your way—which means you can focus on making unforgettable holiday memories.
So, before you pack up the hot cocoa and string lights, put your RV roof at the top of your checklist. A little effort now means a lot more holiday joy later. Safe travel!