
There is a specific kind of excitement that hits right around this time of year. You know the feeling—the days are getting a little longer, the temperatures are creeping up, and you’re already mentally planning that first camping trip of the season. But before you load up the gear and hit the road, there is one massive reality check you need to deal with: your RV has been sitting through the winter.
Whether you parked it in storage or kept it in the driveway, winter can be brutal on a rig. The freeze-thaw cycles, the heavy snow loads, and the sitting moisture don’t just disappear when the sun comes out. They often leave behind a trail of hidden damage that, if ignored, can turn your first trip into a nightmare of buckets and tarps.
So, grab a ladder (safely!) and let’s talk about what you need to be looking for and, more importantly, how to fix it without spending a fortune at a shop.
The Morning After: Inspecting the Damage
Opening up your RV after winter feels a bit like checking your bank account after the holidays—you’re hoping for the best but expecting the worst. When you get up on that roof, don’t just glance at it. You need to look closely.
The most obvious sign of trouble is cracking. Over the winter, materials expand and contract. If your roof is older, you might see what appears to be “crazing” or tiny fatigue lines. These often start around the stress points—vent collars, skylights, and where the roof meets the sidewalls. Even if they look small now, water has a nasty habit of finding its way in.
You also want to feel around for blisters or bubbles. This usually means moisture has already gotten trapped beneath the membrane, or the adhesion is failing. If you see peeling or delamination, that’s a red flag that the existing coating is giving up the ghost. And don’t forget to check inside your rig! Look at the ceiling panels for discoloration or soft spots. If you see a water stain, the roof damage is likely older than you think.
Proper RV roof care and maintenance isn’t just about fixing leaks; it’s about catching signs—chalking, loss of gloss, or rigid panels—before they turn into structural rot.
Why Winter is the Enemy
You might be wondering, “I covered it, why is it damaged?” or “It didn’t snow that much.” Here’s the thing: it’s not just the snow; it’s the temperature swings.
When water gets into microscopic cracks in your roof and then freezes, it expands. This pushes the crack open wider. Then it thaws, more water gets in deeper, and it freezes again. It’s a slow-motion jackhammer working on your seals. Heavy snow adds weight that can cause sagging, creating new low spots where water ponds. If water sits there for more than 48 hours without draining, it breaks down standard coatings.
You need a barrier that can handle that expansion and contraction without snapping.
The “Magic” Fix: Why Liquid Rubber?
If you found damage, don’t panic. You don’t necessarily need a brand-new roof. You need a better membrane. This is where RV roofing solutions like liquid rubber come into play.
Unlike standard acrylics that sit on top, RV Roof Magic is solvent-based. Why does that matter? Because it creates a chemical cross-link with your existing roof. It doesn’t just stick; it bonds into a seamless membrane. It essentially gives you a new roof right over the old one.
One of the biggest headaches with other RV roof repair products is the prep work—specifically primers. Most systems require you to buy a separate primer, which costs more and takes more time. RV Roof Magic typically never needs a primer. It works on EPDM, fiberglass, metal, and even Alpha rubber roofs.
Plus, it’s designed for the real world. It has a built-in fungicide to fight mold, it’s UV- and ozone-resistant, so the sun won’t bake it brittle, and it stays flexible. That flexibility is key. When your RV twists down the highway or the temperature drops 30 degrees overnight, this coating stretches instead of cracking.
How to Fix It Yourself (Yes, You Can)
You don’t need to be a professional contractor to do this. You need a free weekend and the proper process. If you’re dealing with active drips, you might think you need a tube of roof sealant for leaks, but spot-fixing is often just a band-aid. Coating the whole roof is the permanent fix.
Here is the simple game plan to get your rig road-ready:
- The Prep: This is the most crucial step. You have to clean the roof. Use a product like Roof Protect that actually emulsifies the dirt, grease, and chalky oxidation. It also kills mold spores, preventing them from growing under your new coating. Wash it, rinse it, and then let it dry completely. And I mean entirely. Moisture trapped under the new coating causes bubbles.
- The Details: If you have tears or separated seams, patch them up first. You can use Flash tape or a specific seam tape on those areas.
- Mix It Up: Use an electric drill mixer. Don’t try to stir it by hand with a stick; mix it for about 5 minutes to distribute the solvent evenly.
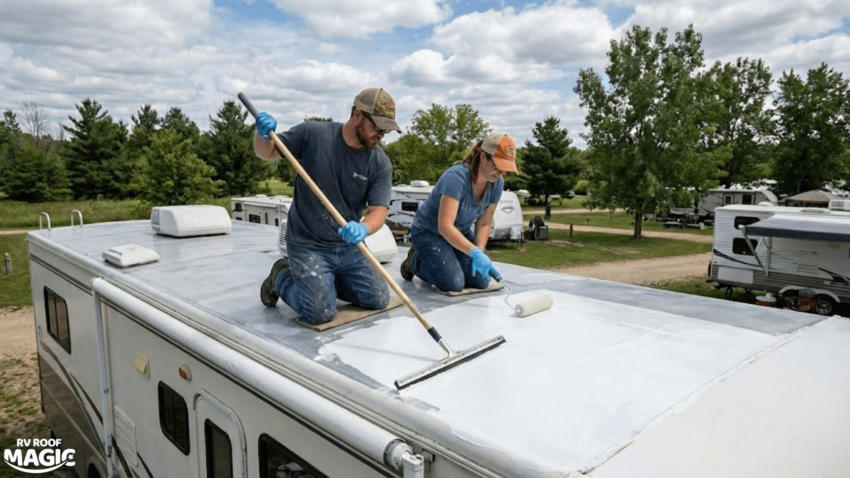
- Apply: You don’t need a sprayer. A 3/8 inch nap roller (not foam!) works perfectly. Pour it out and roll it on. It covers about 50 square feet per gallon. You can tape off the edges with blue painter’s tape for a clean line.
- The Flash Coat: For those tricky areas around vents or AC units, do a quick, light “flash coat” first. Let it tack up, then roll the main coat right over it. This helps seal the gaps without the material running.
The best part? It settles into a seamless, white finish that looks like a custom-fitted sheet. It sets up in a few hours (as long as it’s over 50 degrees outside), and once it’s cured, you are good to go for years.
Get Ready for the Season
Don’t let a winter-worn roof ruin your spring plans. Inspect it now, fix it properly with a high-quality liquid rubber system, and you won’t have to worry about rain clouds chasing you down the highway. You’ll sleep a lot better knowing your roof can handle whatever the weather throws at it—whether that’s a summer storm or next winter’s snow.
Time to get to work so you can get to playing