
There’s nothing that can ruin a road trip faster than waking up in your RV and finding a drip coming from the ceiling. It’s frustrating, it’s stressful — and it’s usually completely preventable.
After 20 years of helping customers repair their RV roofs and guiding owners to handle leaks themselves, I can tell you: fixing a roof leak doesn’t need to be complicated. With a little know-how, the right materials, and a reliable roof sealant for rv, you can seal your RV roof like a pro and enjoy peace of mind on every mile.
Why RV Roofs Leak in the First Place
RV roofs take a beating. Sun exposure, tree branches, and constant flexing on the road wear down seams, vents, and sealants over time. Common causes of leaks include:
- Cracked or dried-out sealant around roof seams, vents, or skylights
- Aging rubber or TPO membranes
- Loose or damaged roof fixtures (like air conditioners or antennas)
- Ponding water and poor drainage
Whether you’ve got an EPDM, TPO, fiberglass, or aluminum roof, leaks usually start small — but if left unchecked, they can cause major water damage, mold, and expensive repairs. That’s why using a camper roof sealer early can make all the difference.

Step 1: Find the Source of the Leak
Finding the leak is half the battle. The wet spot inside your RV isn’t always directly under the source — water can travel quite a distance before showing itself.
Inspection tips:
- Clean the roof first. Dirt and debris can hide small cracks.
- Inspect all seams, vents, skylights, and edges. Look for soft spots, discoloration, or tiny gaps.
- Use a moisture meter or hose test if you can’t find it visually.
Take your time here — proper diagnosis makes all the difference.
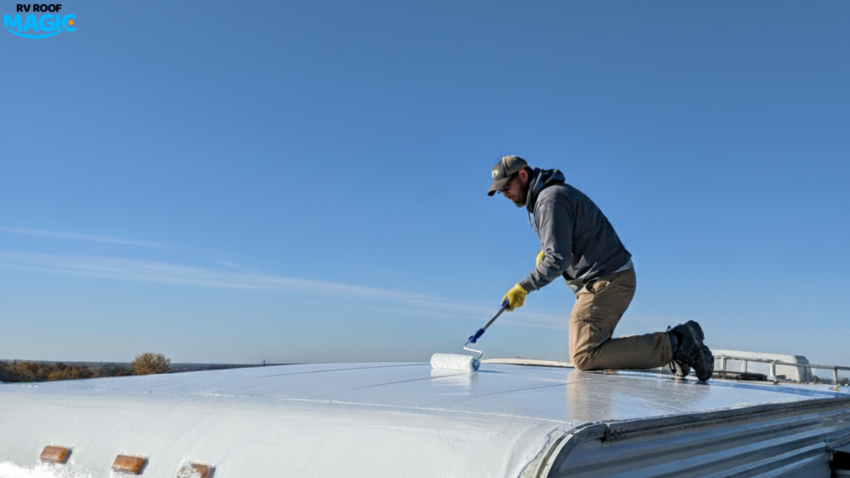
Step 2: Repair the Leak — DIY Style
Once you’ve found the leak, it’s time to fix it using quality rv roofing sealant and coatings.
Tools & Materials Checklist:
- Roof cleaner or mild detergent
- Scraper or utility knife (for removing old sealant)
- Repair tape or patch (if needed)
- RV liquid roof for RV (my top choice: RV Roof Magic)
- Brush, roller, or sprayer
Process:
- Clean the area thoroughly. Remove all dirt, oils, and debris with RoofProtect cleaner.
- Prep the surface. Make sure it’s dry and solid — no loose materials.
- Apply patch or repair tape to any open seams or cracks using SeamTight or Buty Tape.
- Apply your camper roof sealer or coating evenly using a roller or brush.
- Allow proper curing time before exposing to rain or travel. Fortunately, RV Roof Magic waterproofs within three hours.
Solvent-Based vs. Water-Based Roof Coatings: What’s the Difference?
If you’ve ever shopped for RV roofing sealant, you’ve probably noticed two main types — solvent-based and water-based.
Solvent-Based Coatings:
- More durable and long-lasting
- Better adhesion to older, chalky surfaces
- Superior resistance to ponding water and harsh weather
- Cures faster in variable temperatures
After two decades of testing different products, our company found solvent-based rubber RV roof coating offers the best long-term protection — especially for older roofs or those exposed to heavy sun and rain.
That’s why thousands of customers have recommended RV Roof Magic, the only liquid butyl rubber coating of its kind, to their friends and fellow RV owners.
Why I Recommend RV Roof Magic
There’s a reason customers trust this product after 20 years in the field. RV Roof Magic isn’t just another roof sealant for RV — it’s a professionally engineered RV liquid roof coating that forms a seamless, watertight membrane over your entire roof.
What makes it stand out:
- Only one coat and never needs a primer
- ASTM Certified
- Made in the USA with 20+ years of proven success
- Comes with a 10-year warranty
- Bonds directly to EPDM, TPO, fiberglass, and metal roofs
- 100% waterproof and UV-resistant once cured
- Simple, DIY-friendly application
Whether you’re sealing a small patch or recoating your entire roof, RV Roof Magic delivers professional-grade durability with homeowner ease.
For more information or product guidance, call RV Roof Magic at 855-281-0907.
Step 3: Prevent Future Leaks
An ounce of prevention goes a long way. Once your roof is leak-free, keep it that way with these simple habits:
- Inspect your roof twice a year (spring and fall).
- Clean it regularly — dirt shortens coating life.
- Touch up small cracks early before they grow.
- Avoid parking under low-hanging branches.
- Reapply a maintenance coat as recommended by the manufacturer.
Using the best camper roof sealant now saves thousands in repairs later.
Common Mistakes to Avoid
- Using the wrong type of RV roofing sealant for your roof material
- Applying coating over dirty or wet surfaces
- Mixing incompatible products (like silicone over butyl)
- Ignoring proper curing time
- Failing to clean and reseal vents or skylights
Take your time and use the right materials, and your roof will stay watertight for years.
Final Thoughts: You’ve Got This
Don’t let a roof leak ruin your adventures. With patience, the right tools, and a premium camper roof sealer like RV Roof Magic, you can fix leaks yourself and protect your RV for the long haul.
After two decades of hands-on experience, I can confidently say — RV Roof Magic remains the best camper roof sealant trusted by thousands.
For expert advice, call 855-281-0907 or visit their website to learn more about this industry-leading rubber rv roof coating.
Keep rolling, stay dry, and enjoy the journey.